This post will explain about creating new page layout for SharePoint Online, same logic is applicable for SharePoint 2013 and 2016.
Custom page layout can be used in SharePoint publishing site or Publishing feature enabled sites. Custom page layout can be used in SharePoint default master page or our custom master page,

check my previous post about how to create custom master page for SharePoint
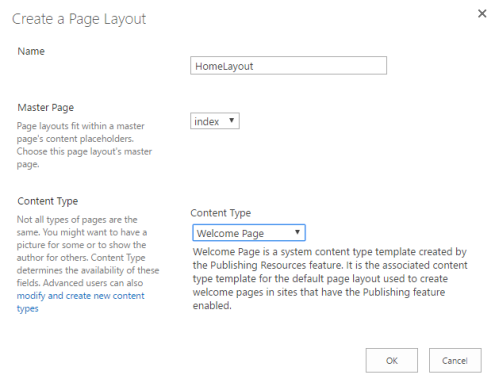
Navigate to SharePoint design manager and click Edit Page Layout link then click Create a page layout, in the popup enter new layout name and select master page and select existing SharePoint default content type or create new content type based on your requirement, you can find the create new content type link on the same popup.

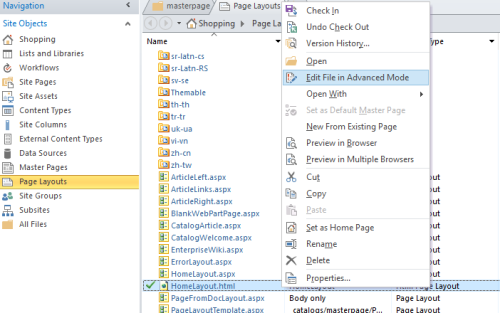
Once the page layout is created, open SharePoint Designer 2013 and open site on that. On the left side of SharePoint Designer select layout and you can find newly created layout files, there will be two files in same name one is HTML and another one is ASPX extension.
Check out the newly created page layout (HTML extension) and right click and select Edit File in Advanced Mode option.

Once page layout opened then find out ContentPlaceHolder ID of “PlaceHolderMain”, clear all div elements inside the place holder and paste your page layout HTML or prepare your HTML inside.
If you created custom master page using HTML template conversion logic, then you have to cut center content(layout content) from master page and paste in this page layout.
Navigate to site home page and edit the page and select page tab, in that tab open page layout drop down and select our new layout.
And now your new page layout is ready..!!
Please feel free to let me know if you have any queries in the comment section, I’m happy to help you!!
Happy coding!!