Step 1:
Navigate Site Actions–>Site Settings –>under Galleries–>Click Site Content Types and then click Create Button.

Step 2:
In the Select parent content type from list, select Document Set Content Types and then click OK.

Step 3:
On the Site Content type Advanced Settings page, select Upload a new document template, and then click Browse to browse to and select the document template you want to assign to the site content type. A document template choose can be any file such as an Excel spreadsheet, a Word document or template, a PowerPoint slide presentation, etc.And then click OK.


Step 4:
In the Document Library Setting dialog under General Settings, click Advanced Settings.In the Content Types section, click Yes for Allow management of content types and then click OK.

Step 4:
Back in the Document Library Setting dialog under Content Types, click Add from existing site content types.In the Available Site Content Types list, select your content type and then click Add.


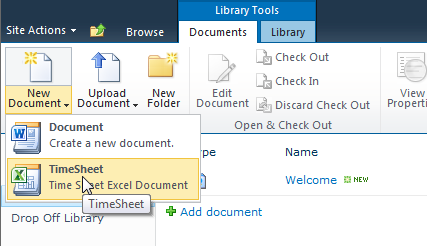
Step 5:
Now we can see the new content type on the New Document menu.

This was very helpful however I got list in Step 5.
I see my new content type under “new document” but do not understand the following instruction”
“Click the New Document list and select your content type, type a name for the new document set, and then click OK.”
When I click on my new content type it launches in excel. Please explain what you mean by “type a name for the new document set”. Where do I type the name? Are you asking us to open the document and do a file ‘save as’?
Thank you,
Dora
LikeLike
I complicated to explain document save-as logic, check now that step has been simplified,
LikeLike
Hi,
thanks for this useful post,
I would like to do all those steps you have done but programmatically. is it possbile?
LikeLike
Hi Kourosh71,
Yes possible, Check my new post.
https://sptechnet.wordpress.com/2012/03/01/programmatically-add-excel-word-access-content-types-sharepoint-2010-6/
LikeLike
Thank you
LikeLike